
Is Mewtwo V-UNION Viable for Worlds?
Hello everyone! Here’s Gabriel again with another Pokémon TCG article and this time I’m going to talk about a deck that many knows exist, but few truly know how it works to win games and reach the Top 4 of one of the main Pokémon TCG competitions of the world.
About Mewtwo V-UNION
 My interest in writing about Mewtwo V-UNION arose when I realized that good Pokémon TCG players didn’t know how the deck actually worked. As much as the deck has been successful in the North American International Championship thanks to players like Mees Brenninkmeijer and especially Sander Wojcik, it is not a deck that has become popular and few players are interested in testing the deck or at least knowing what to do when you face a deck like this. But if an entirely new deck made the Top Four at the NAIC, why do I get the feeling the deck isn’t being taken seriously?
Despite never knowing for sure the answer to this question, it is possible to have an idea of some reasons that can lead players to prefer the existence of this deck instead of testing and understanding how this wonderful idea works. The reason I hear most from the players that I coach and my friends is that Mewtwo V-UNION is a deck that gains a lot of strength in the surprise factor and now that the deck is already known, all that can change, because instead of Mewtwo V-UNION being the deck that wins the metagame, it is now part of the metagame and can be countered by prepared opponents. For players who already have some deck preferences and don’t intend to use Mewtwo V-UNION, the reason I hear most is that it’s not worth studying, training, much less investing in tech cards against Mewtwo V-UNION because the deck is not popular.
It is true that Mewtwo V-UNION is a totally different one from what we are used to, after all, it is the first time that a Pokémon V-UNION appears in the Top Eight of a competition, even more being the NAIC, however, the surprise factor despite being a good edge in your favor, strength, deckbuilding and the quality of the player who is piloting the deck are still the strengths that matter. Regarding the low popularity of Mewtwo V-UNION, I also hear from players that playing control is boring. The word boring is divisive because a competitive player will not always play with fun decks if they want to win. The word boring can mean that the deck is difficult to pilot because it is a complex and different list. Another reason for the deck to be considered “boring” could be because the deck attacks little and takes time to win. In many games you will beat your opponent fast, but for you to theoretically get the win by collecting the six Prizes you could end up using all the available 50 minutes of the round, even if your opponent doesn’t pose the slightest danger to you. The NAIC Sander Vs. Blue Top Four match illustrates this well; Azul lost the second game in a few minutes, and for Sander to finish the game took much longer because the process of returning resources from the discard to the hand is painfully slow. It’s incomparable to the time when it had [card name=”Oranguru” set=”Ultra Prism” no=”114″ c=”name”][/card] with Resource Management and [card name=”Lusamine” set=”Crimson Invasion” no=”96″ c=”name”][/card] in the format.
How do you win games with Mewtwo V-UNION?
The first question I asked the players I coach when I said I would play Mewtwo V-UNION against them was, “do you know how you intend to win this match, and do you know how I intend to win this match?” The answers ranged from “no” to “more or less…”.
Although the deck was presented a couple of weeks ago, the truth is that if there is no real intention of wanting to learn about Mewtwo V-UNION, there will be few opportunities you will have to face a deck like this in the Pokémon Trading Card Game Online or in Local Tournaments. The Mewtwo V-UNION deck was a deck built by highly competitive players, especially for use in a highly competitive tournament like NAIC.
[cardimg name=”Origin Forme Palkia VSTAR” set=”Astral Radiance” no=”40″ align=”right” c=”none”][/cardimg]
Back to the subject, it’s important to understand that although Mewtwo V-UNION is an interesting Pokémon card, the deck as a whole is an anti-meta call and it was built around the main decks of the format, which are: [card name=”Origin Forme Palkia VSTAR” set=”Astral Radiance” no=”40″ c=”name”][/card]/ [card name=”Inteleon” set=”Sword and Shield” no=”58″ c=”name”][/card], [card name=”Arceus VSTAR” set=”Brilliant Stars” no=”123″ c=”name”][/card] / Inteleon, [card name=”Mew VMAX” set=”Fusion Strike” no=”114″ c=”name”][/card] and Arceus VSTAR / [card name=”Flying Pikachu VMAX” set=”Celebrations” no=”7″ c=”name”][/card]. To win each of these decks, you’ll need to play differently in all these matchups, even if your strategy has a common goal: to prevent your opponent from attacking you. Only after making your opponent unable to attack will you start attacking your opponent to get the six Prizes. As long as your opponent has the resources to attack you, your objective is to delay the opponent as long as possible so that you can find the four parts of the Mewtwo V-UNION and thus put it in the discard. After Mewtwo V-UNION comes to the field, the idea is to use the Union Gain attack to get Energy, and then attack for as long as necessary with the Super Regeneration attack. If the opponent doesn’t have a way to deal more than 200 damage, then they basically have no way to KO Mewtwo V-UNION, and Palkia VSTAR and Arceus VSTAR don’t deal more than 200 damage normally.
Against Mew VMAX the gameplay changes a bit, as a big matchup piece is [card name=”Yveltal” set=”Celebrations” no=”19″ c=”name”][/card]. Unlike Palkia VSTAR and Arceus VSTAR, Mew VMAX can hit over 300 damage if needed, so it’s capable of Knocking Out Mewtwo V-UNION. The path to victory is still the same; discard the opponent’s Energy, form Mewtwo V-UNION, and get the six Prizes. The big difference is that Mew VMAX’s strength comes from Special Energy and if Yveltal, [card name=”Flannery” set=”Chilling Reign” no=”139″ c=”name”][/card] and [card name=”Crushing Hammer” set=”Sword and Shield” no=”159″ c=”name”][/card] do their respective jobs, it’s possible to slow them down enough to better control the opponent.
[premium]
Its Place in the Meta
Whenever you decide to use Mewtwo V-UNION in a competition, it’s important to map out the metagame you expect. Below is the Tier List that I hope to face if I participate in a tournament.
Tier One
Origin Forme Palkia VSTAR / Inteleon
Arceus VSTAR / Inteleon
Arceus VSTAR / [card name=”Bibarel” set=”Brilliant Stars” no=”121″ c=”name”][/card] / Flying Pikachu VMAX
Mew VMAX
Tier Two
[card name=”Blissey V” set=”Chilling Reign” no=”119″ c=”name”][/card] / [card name=”Miltank” set=”Astral Radiance” no=”126″ c=”name”][/card]
Arceus VSTAR / [card name=”Duraludon VMAX” set=”Evolving Skies” no=”123″ c=”name”][/card]
Inteleon / [card name=”Radiant Charizard” set=”Pokemon GO” no=”11″ c=”name”][/card] / Techs
[card name=”Origin Forme Dialga VSTAR” set=”Astral Radiance” no=”114″ c=”name”][/card]
[card name=”Regigigas” set=”Astral Radiance” no=”130″ c=”name”][/card]
The List
[decklist name=”Mewtwo V-UNION” amt=”60″ caption=”” cname=”Mewtwo V-UNION” set=”Sword and Shield Black Star Promos” no=”SWSH162 “][pokemon amt=”15″]4x [card name=”Snorlax” set=”Vivid Voltage” no=”131″ c=”deck2″ amt=”4″][/card]2x [card name=”Galarian Meowth” set=”Rebel Clash” no=”126″ c=”deck2″ amt=”2″][/card]2x [card name=”Miltank” set=”Astral Radiance” no=”126″ c=”deck2″ amt=”2″][/card]2x [card name=”Yveltal” set=”Celebrations” no=”19″ c=”deck2″ amt=”2″][/card]1x [card name=”Pyukumuku” set=”Fusion Strike” no=”77″ c=”deck2″ amt=”1″][/card]1x [card name=”Mewtwo V-UNION” set=”Sword and Shield Black Star Promos” no=”SWSH159 ” c=”deck2″ amt=”1″][/card]1x [card name=”Mewtwo V-UNION” set=”Sword and Shield Black Star Promos” no=”SWSH160 ” c=”deck2″ amt=”1″][/card]1x [card name=”Mewtwo V-UNION” set=”Sword and Shield Black Star Promos” no=”SWSH161 ” c=”deck2″ amt=”1″][/card]1x [card name=”Mewtwo V-UNION” set=”Sword and Shield Black Star Promos” no=”SWSH162 ” c=”deck2″ amt=”1″][/card][/pokemon][trainers amt=”39″]2x [card name=”Professor’s Research” set=”Celebrations” no=”24″ c=”deck2″ amt=”2″][/card]2x [card name=”Peonia” set=”Chilling Reign” no=”196″ c=”deck2″ amt=”2″][/card]2x [card name=”Cyllene” set=”Astral Radiance” no=”138″ c=”deck2″ amt=”2″][/card]2x [card name=”Flannery” set=”Chilling Reign” no=”139″ c=”deck2″ amt=”2″][/card]1x [card name=”Avery” set=”Chilling Reign” no=”130″ c=”deck2″ amt=”1″][/card]1x [card name=”Boss’s Orders” set=”Rebel Clash” no=”154″ c=”deck2″ amt=”1″][/card]1x [card name=”Sidney” set=”Fusion Strike” no=”241″ c=”deck2″ amt=”1″][/card]1x [card name=”Cook” set=”Fusion Strike” no=”228″ c=”deck2″ amt=”1″][/card]1x [card name=”Team Yell’s Cheer” set=”Brilliant Stars” no=”149″ c=”deck2″ divide=”yes” amt=”1″][/card]4x [card name=”Trekking Shoes” set=”Astral Radiance” no=”156″ c=”deck2″ amt=”4″][/card]4x [card name=”Ultra Ball” set=”Brilliant Stars” no=”150″ c=”deck2″ amt=”4″][/card]4x [card name=”Quick Ball” set=”Fusion Strike” no=”237″ c=”deck2″ amt=”4″][/card]4x [card name=”Scoop Up Net” set=”Rebel Clash” no=”165″ c=”deck2″ amt=”4″][/card]4x [card name=”Crushing Hammer” set=”Sword and Shield” no=”159″ c=”deck2″ amt=”4″][/card]2x [card name=”Pal Pad” set=”Sword and Shield” no=”172″ c=”deck2″ amt=”2″][/card]1x [card name=”Tool Jammer” set=”Battle Styles” no=”136″ c=”deck2″ amt=”1″][/card]1x [card name=”Cape of Toughness” set=”Darkness Ablaze” no=”160″ c=”deck2″ amt=”1″][/card]1x [card name=”Big Parasol” set=”Darkness Ablaze” no=”157″ c=”deck2″ divide=”yes” amt=”1″][/card]1x [card name=”Rose Tower” set=”Darkness Ablaze” no=”169″ c=”deck2″ amt=”1″][/card][/trainers][energy amt=”6″]3x [card name=”Psychic Energy” set=”Sun and Moon” no=”162″ c=”deck2″ amt=”3″][/card]3x [card name=”Twin Energy” set=”Rebel Clash” no=”174″ c=”deck2″ amt=”3″][/card][/energy][/decklist]
Cards Explanation
Burn Your Deck as a Priority
Four Snorlax, Two Galarian Meowth, One Pyukumuku
[cardimg name=”Cyllene” set=”Astral Radiance” no=”183″ align=”right” c=”none”][/cardimg]
The main strategy of the deck is to use your best Trainer infinitely to disrupt the opponent and for that you need to draw almost all of your deck so that you only have access to the cards you need, which are: [card name=”Pal Pad” set=”Sword and Shield” no=”172″ c=”name”][/card], [card name=”Team Yell’s Cheer” set=”Brilliant Stars” no=”149″ c=”name”][/card], Cyllene, and the cards you need to return with Cyllene.
If you want to draw a lot of cards per turn, there are a few ways to do that, even if it doesn’t get you anywhere, but the focus here is not to draw a lot of cards, but to thin your deck and at this point the duo [card name=”Snorlax” set=”Vivid Voltage” no=”131″ c=”name”][/card] and [card name=”Galarian Meowth” set=”Rebel Clash” no=”126″ c=”name”][/card] is great. For only six slots on the list and all of them Basic single-Prize Pokémon, you have a genius engine to discard cards from your hand with Galarian Meowth and at the end of the turn fill your hand again with up to seven cards with Snorlax. Thanks to this process you can get through the deck in about four turns.
Miracle Body Hinders the Opponent
Two Miltank
Since its release, [card name=”Miltank” set=”Astral Radiance” no=”126″ c=”name”][/card] has been causing problems for players who insist on playing with a deck that has no way of dealing with the Miracle Body Ability. It used to be common for players to get free wins because the opponent has no answer for the cow, but now players are getting ready to deal with one or even two Miltank. Thanks to Cyllene, the two copies of Miltank on the list can become as many as you need.
The main idea of Miltank is not to get free wins — this will be increasingly rare as Miltank gains presence in the metagame — the idea in practice is to hinder the opponent for a few turns, until you manage to finish your deck and bring Mewtwo V-UNION in the field. If you can get a couple of turns without getting Knocked Out, then you’ll be able to thin your deck with more calm and with quality.
Pokemon’s Answer to Exodia
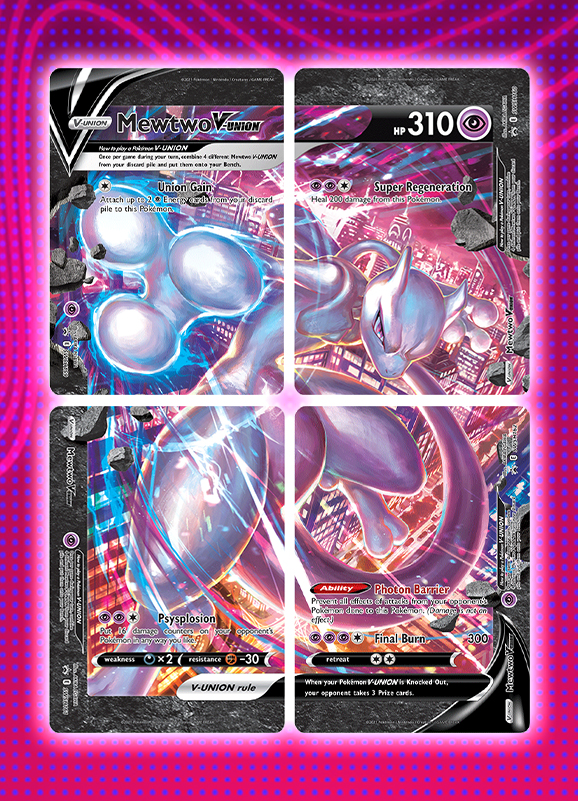
Mewtwo V-UNION
Nobody expected to see a Pokémon V-UNION do such an expressive result, much less the way it was. If I were to bet on a V-UNION Pokémon appearing, I’d think it would appear in an [card name=”Arceus VSTAR” set=”Brilliant Stars” no=”123″ c=”name”][/card] deck or something, and it would be sort of a second attacker, but in this deck, it’s totally different because it’s actually the protagonist — when Mewtwo V-UNION appears on the field, the game changes completely! Often the opponent will concede as soon as it appears, as there is nothing else they can do against a Pokémon that heals all the damage, over and over.
With rare exceptions, you will need the Mewtwo V-UNION to finish the game. In a competition, there will be few tournaments where the opponent will concede quickly, so you need to get the six Prizes, especially if the opponent knows that sometimes it can take you 40 minutes to finish a match that you established control in the first few 10 minutes.
How the Resource Looping Works
Two Cyllene, One Team Yell’s Cheer, Two Pal Pad
[cardimg name=”Crushing Hammer” set=”Ultra Prism” no=”166″ align=”right” c=”none”][/cardimg]
These are the cards responsible for making your resources become infinite. After clearing the deck and bringing Mewtwo V-UNION to the field, your mission will be to use these cards over and over again with the aim of returning resources to remove all possibilities of making the opponent attack you. In many cases, you eventually want to come back to [card name=”Crushing Hammer” set=”Sword and Shield” no=”159″ c=”name”][/card], simply because the effect of this card is so strong and works against everything.
The problem with this loop is that it takes too long! [card name=”Cyllene” set=”Astral Radiance” no=”138″ c=”name”][/card] is the Supporter that does the magic of Crushing Hammer multiplication, but these two cards are based on a coin flip and because of that the process takes a lot longer than you think. The problem with the coin flip is not about the effectiveness of the strategy, because if you have time, you have to play coin flips for 50 minutes and then you should get the resources needed to finish the game, the problem is in fact that 50 minutes may not be enough…
The time taken to toss a coin or dice should be about ten seconds, if it lands on the floor or on the side table, the time increases. If you have to do this 30 times, the ten seconds becomes four minutes. Every time you use Pal Pad or Team Yell’s Cheer, you need to shuffle the deck, which should take about 25 seconds, but if you have to do it 20 more times, it takes a lot longer. If by chance, you fail a lot of Cyllene and Crushing Hammer flips, you need to repeat the whole process. This is simply enacting the loop, this doesn’t account for possible slowplay by the opponent or even take into account that your opponent is being aggressive and prevents you from happily doing your loop.
This is the type of strategy that you only choose to use in a competition if you are VERY experienced, to make your plays faster and more automatic.
The Best Supporter to Thin Your Deck
Two Professor’s Research
In a deck where one of the goals is to discard all of your cards, doesn’t it make sense to use four [card name=”Professor’s Research” set=”Brilliant Stars” no=”147″ c=”name”][/card]? Yes, but during the process of clearing the deck, you also need to disrupt the opponent so that you can establish control later. Because of this, you don’t have as many opportunities to use Professor’s Research, but don’t worry! The [card name=”Snorlax” set=”Vivid Voltage” no=”131″ c=”name”][/card] and [card name=”Galarian Meowth” set=”Rebel Clash” no=”126″ c=”name”][/card] combo already does a pretty good job in this regard.
Access 100% of Your Prize Cards
Two Peonia
One of the things I like most about control decks is that you usually have access to all the cards in your deck, including the Prizes with [card name=”Peonia” set=”Chilling Reign” no=”149″ c=”name”][/card], and you can use the same card more than once. The extended play time caused by these decks allows you to use a single copy of several cards in your deck, as you have time to find and recycle. Consequently, they are the most complicated decks to play, precisely because you can have many single copies of cards and many effects available.
Supporters to control the opponent’s power
One Avery, One Boss’s Order, Two Flannery, One Sidney, One Cook
In the current format, the best disruptive effects are caused by Supporters, and unfortunately, you can only use one Supporter per turn. To make up for that time, you need to prolong the game as long as you can, and in that Mewtwo V-UNION does a fantastic job. Any other Pokemon would need [card name=”Cheryl” set=”Battle Styles” no=”123″ c=”name”][/card] or some crazy strategy to heal itself, but Mewtwo V-UNION does it alone and infinitely.
[cardimg name=”Avery” set=”Chilling Reign” no=”187″ align=”right” c=”none”][/cardimg]
With the time issue resolved, all you need to do is know how to use the right Supporter for the right situation. [card name=”Avery” set=”Chilling Reign” no=”130″ c=”name”][/card] is a draw Supporter which also hampers the setup of Inteleon decks, which is good while you’re still in the process of emptying your deck.
After establishing control, Avery is useful against [card name=”Origin Forme Palkia VSTAR” set=”Astral Radiance” no=”40″ c=”name”][/card] to wipe out the opponent’s available Basic Pokémon, thereby reducing that Pokémon’s damage. Theoretically, Origin Forme Palkia VSTAR doesn’t do enough damage to give Mewtwo V-UNION problems, but depending on the opponent’s list it can surprise you and can add much more damage than expected. Quick Shooting [card name=”Inteleon” set=”Chilling Reign” no=”43″ c=”name”][/card], [card name=”Galarian Zigzagoon” set=”Sword and Shield” no=”117″ c=”name”][/card], [card name=”Choice Belt” set=”Brilliant Stars” no=”135″ c=”name”][/card], [card name=”Leon” set=”Vivid Voltage” no=”154″ c=”name”][/card], and [card name=”Echoing Horn” set=”Chilling Reign” no=”136″ c=”name”][/card] are some examples of damage boosters an Origin Forme Palkia VSTAR deck can have.
[card name=”Sidney” set=”Fusion Strike” no=”241″ c=”name”][/card] and [card name=”Flannery” set=”Chilling Reign” no=”139″ c=”name”][/card] are techs for [card name=”Mew VMAX” set=”Fusion Strike” no=”114″ c=”name”][/card] and can help against [card name=”Blissey V” set=”Chilling Reign” no=”119″ c=”name”][/card], but against the other big matches in the metagame, you won’t want to use your Supporter for turn on them because you need to adopt a fast and efficient playstyle to compensate the slowness of the strategy. Sidney can have a special function, which is to take Pokémon Tool away from the opponent. The opponent will hold on to its resources to use them at the right time; when they are capable of Knocking Out Mewtwo V-UNION or at least causing damage greater than 200.
[card name=”Cook” set=”Fusion Strike” no=”228″ c=”name”][/card]’s purpose is to clean up any damage left over from the Mewtwo V-UNION when the opponent does more than 200 damage. At first, the idea is to control the opponent so that they don’t do more than 200 damage. Then the idea is to stop them from attacking completely, so you can stop healing and start doing damage. You will need to use Cook for a while when you still haven’t established 100% control and until you can find a better way to decrease your opponent’s damage or stop them from attacking entirely.
The Pokémon Search Count
Four Ultra Ball, Four Quick Ball
One of the difficulties in discarding the four parts of Mewtwo V-UNION is the fact that it’s not a Basic or Evolution Pokémon; it’s classified only as Pokémon V-UNION. In other words, [card name=”Quick Ball” set=”Fusion Strike” no=”237″ c=”name”][/card] doesn’t work and neither does [card name=”Evolution Incense” set=”Sword and Shield” no=”163″ c=”name”][/card]– only [card name=”Ultra Ball” set=”Brilliant Stars” no=”150″ c=”name”][/card].
Another function of Ultra Ball and Quick Ball is to discard cards from your hand like [card name=”Galarian Meowth” set=”Rebel Clash” no=”126″ c=”name”][/card] does, so you can draw more cards with [card name=”Snorlax” set=”Vivid Voltage” no=”131″ c=”name”][/card] later.
Thin More!
Four Trekking Shoes
There’s not much to say here, [card name=”Trekking Shoes” set=”Astral Radiance” no=”156″ c=”name”][/card] fulfill their role and help thin your deck.
Of Course, the Hammers
Four Crushing Hammer
It is the strongest option in the deck in terms of preventing the opponent from attacking, and at the end of the game, the most effective loop is using [card name=”Cyllene” set=”Astral Radiance” no=”138″ c=”name”][/card] to return [card name=”Crushing Hammer” set=”Sword and Shield” no=”159″ c=”name”][/card].
Control the Prizes Your Opponent Can Take
Four Scoop Up Net
[card name=”Scoop Up Net” set=”Rebel Clash” no=”165″ c=”name”][/card] in this deck isn’t as strong as an [card name=”Inteleon” set=”Sword and Shield” no=”58″ c=”name”][/card] deck or a deck like turbo [card name=”Origin Forme Dialga VSTAR” set=”Astral Radiance” no=”114″ c=”name”][/card], but it’s still important to use four copies because that way you have full control of your field. Thanks to Scoop Up Net, you increase the chance of using Snorlax in the beginning of the game, but it is at the end of the game that this Item will truly shine; you can pick up the single-Prize Pokémon from the field after Mewtwo V-UNION appears.
Some Spicy Tools
One Cape of Toughness, One Big Parasol, One Tool Jammer
Each of these Tools has a large amount of weight in the strategy; the [card name=”Cape of Toughness” set=”Darkness Ablaze” no=”160″ c=”name”][/card] on [card name=”Miltank” set=”Astral Radiance” no=”126″ c=”name”][/card] makes it resist an attack from Shady Dealings Inteleon, while [card name=”Tool Jammer” set=”Battle Styles” no=”136″ c=”name”][/card] will nullify the opponent’s [card name=”Choice Belt” set=”Astral Radiance” no=”211″ c=”name”][/card] to make sure they cannot hit more than 200 damage. [card name=”Big Parasol” set=”Darkness Ablaze” no=”157″ c=”name”][/card] is much more situational, but without this Tool you can’t beat [card name=”Regigigas” set=”Astral Radiance” no=”130″ c=”name”][/card], mainly because of [card name=”Regice” set=”Astral Radiance” no=”37″ c=”name”][/card].
Rose Tower to loop faster
One Rose Tower
[cardimg name=”Rose Tower” set=”Darkness Ablaze” no=”169″ align=”right” c=”none”][/cardimg]
The deck does not suffer from any Stadium in the format, especially the most popular ones. One of the functions of [card name=”Rose Tower” set=”Darkness Ablaze” no=”169″ c=”name”][/card] that most catches my attention is precisely for the end of the game; when Mewtwo V-UNION is on the field and your deck is thin.
Thanks to Rose Tower you will be able to draw one or two more cards, which is enough to pick up the whole deck, have access to the cards you need, and then go back to using [card name=”Pal Pad” set=”Sword and Shield” no=”172″ c=”name”][/card] and [card name=”Team Yell’s Cheer” set=”Brilliant Stars” no=”149″ c=”name”][/card] to return resources to your deck.
This allows you to pick up the things you’ve just returned to the deck, and you can use this Stadium along with [card name=”Pyukumuku” set=”Fusion Strike” no=”77″ c=”name”][/card] in order to achieve that.
Final Thoughts
It’s funny to see how a list like this scares players. Many prefer to ignore its existence or believe that it won’t be a relevant deck in the future simply to not have to deal with a complex list and a slow playing style. I confess that control decks aren’t my style either, but I won’t stop studying and understanding such creative ideas. It’s important to value when players can make the “impossible” happen, including bringing a Pokémon V-UNION to the competitive environment for the first time. Today’s article is a tribute to the creativity of Pokémon TCG players, which makes this game more fascinating than it should be.
That’s all for today, I hope you liked it and until next time!
[/premium]