
The Ascent of the Crazy Crab – Klawf / Terapagos ex Breakdown
Hey PokeBeach readers, Ciaran back with another article today! As I expected, Surging Sparks did not bring us any new Tier 1 archetypes focused on the Pokémon in the set, but it did seriously buff some old archetypes. We saw [card name=”Miraidon ex” set=”Scarlet and Violet” no=”81″ c=”name”][/card] win the Sacramento Regional Championships, making great use of the new [card name=”Magneton” set=”Surging Sparks” no=”59″ c=”name”][/card]. The deck was able to mow through the plethora of [card name=”Regidrago VSTAR” set=”Silver Tempest” no=”136″ c=”name”][/card] decks en route to a victory. The finals was a Miraidon ex mirror-match, showing just how powerful the deck has gotten with the addition of Magneton. We have also seen other archetypes take advantage of new cards like [card name=”Energy Search Pro” set=”Surging Sparks” no=”176″ c=”name”][/card] powering [card name=”Gholdengo ex” set=”Paradox Rift” no=”139″ c=”name”][/card] to three Top 8 placements across the Regionals in this format. As expected, [card name=”Pikachu ex” set=”Surging Sparks” no=”57″ c=”name”][/card] has helped Lost Zone decks compete in the meta, but they haven’t been able to break through to a top cut yet. [card name=”Precious Trolley” set=”Surging Sparks” no=”185″ c=”name”][/card] has also been a big boon to help decks with their setup, and we saw a super unique build of [card name=”Gardevoir ex” set=”Scarlet and Violet” no=”86″ c=”name”][/card] make Top 8 in Stuttgart using the card in combination with [card name=”Call Bell” set=”Surging Sparks” no=”165″ c=”name”][/card] to help the deck set up. There have also been some [card name=”Charizard ex” set=”Obsidian Flames” no=”125″ c=”name”][/card] decks running the ACE SPEC to help their turn ones.
Klawf’s Place in the Meta
All of these decks are cool, but my favourite deck that has seemingly jumped from meme status to real Tier 1 contender with the release of Surging Sparks is none other than [card name=”Klawf” set=”Paradox Rift” no=”105″ c=”name”][/card]! The deck has always been on the fringes of competitiveness and has had some success from time to time, but never produced consistent results. Surging Sparks has provided the deck with two key cards that help a lot with consistency in [card name=”Latias ex” set=”Surging Sparks” no=”76″ c=”name”][/card], and the previously mentioned Precious Trolley. The deck has also found a new partner in [card name=”Terapagos ex” set=”Stellar Crown” no=”128″ c=”name”][/card] that helps unlock the full potential of Precious Trolley and hit higher damage numbers!
One of the problems Klawf has had is that the most damage it can do is 240 if you have [card name=”Binding Mochi” set=”Shrouded Fable” no=”55″ c=”name”][/card] and [card name=”Radiant Hisuian Sneasler” set=”Lost Origin” no=”123″ c=”name”][/card] in play. With [card name=”Area Zero Underdepths” set=”Stellar Crown” no=”131″ c=”name”][/card] you can fill your Bench to eight Pokémon and have Terapagos ex hit for 290 damage after our modifiers! This is enough to take out VSTAR Pokémon such as [card name=”Lugia VSTAR” set=”Silver Tempest” no=”139″ c=”name”][/card] and more importantly [card name=”Regidrago VSTAR” set=”Silver Tempest” no=”136″ c=”name”][/card]. To me this is the biggest reason the deck is strong, being able to use a one-Prize attacker, but having Terapagos ex, and later on in the game [card name=”Bloodmoon Ursaluna ex” set=”Twilight Masquerade” no=”141″ c=”name”][/card], to hit bigger numbers. Most other decks can’t efficiently weave in a single-Prize attacker that does as much damage!
Not only does Area Zero Underdepths help the deck do more damage, but it also lets the deck play a plethora of support Pokémon. Besides your main attackers, the deck needs space for Bench-sitters that enable setup and damage. Pokémon such as [card name=”Latias ex” set=”Surging Sparks” no=”76″ c=”name”][/card], [card name=”Squawkabilly ex” set=”Paldea Evolved” no=”169″ c=”name”][/card], [card name=”Brute Bonnet” set=”Paradox Rift” no=”123″ c=”name”][/card], Radiant Hisuian Sneasler, and [card name=”Oranguru V” set=”Astral Radiance” no=”133″ c=”name”][/card]. It is not uncommon to play Precious Trolley on turn one and grab six to seven Pokémon. Talk about insane value from one card! Without Area Zero your Bench does get clogged quickly. The other nice thing about this deck is that after you are established it isn’t that back-breaking to have your Stadium replaced since you can discard your setup Pokémon such as Squawkabilly ex or [card name=”Lumineon V” set=”Brilliant Stars” no=”40″ c=”name”][/card]. You also don’t solely rely on Terapagos ex for damage as you have Klawf and Bloodmoon Ursaluna ex to hit for Knock Outs.
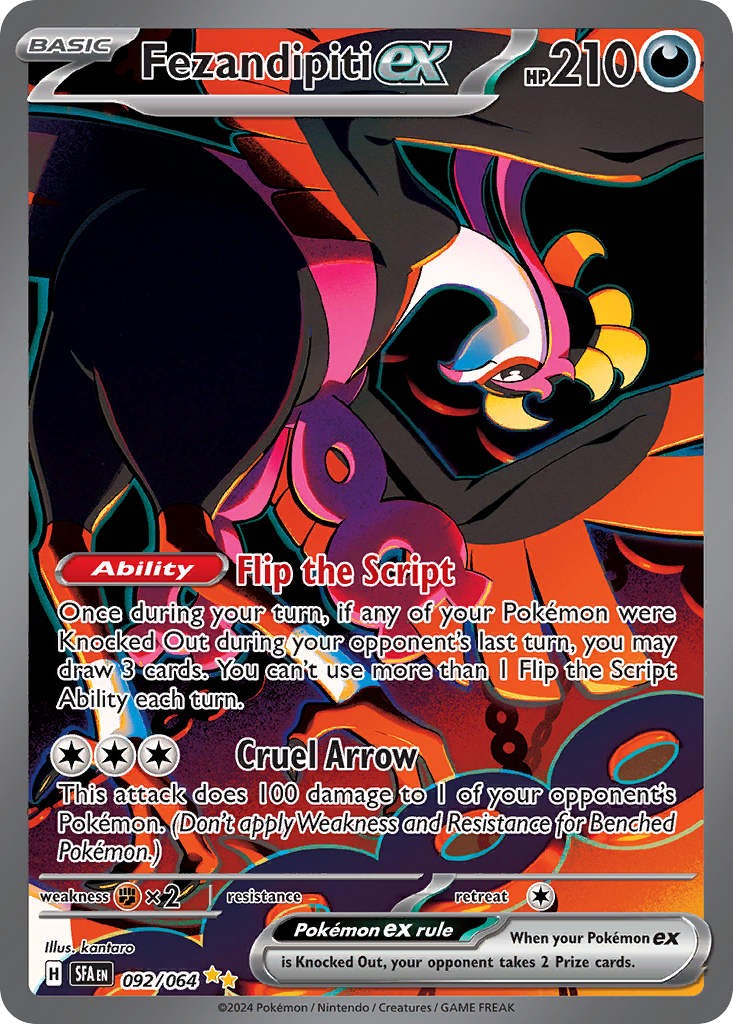
The most underrated part of this deck however is that you get to Knock Out your Poisoned opponent with poison damage during the Pokémon Checkup stage more often than not. While this might seem inconsequential, it has huge ramifications in-game. Having your opponent’s Pokémon Knocked Out during Pokémon Checkup stops a lot of popular cards from working — the most relevant one being [card name=”Fezandipiti ex” set=”Shrouded Fable” no=”38″ c=”name”][/card]. This card is a mainstay in the game currently and enables decks to consistently dig for their combo pieces and execute their strategies. The Flip the Script Ability allows you to draw three cards if any of your Pokémon were Knocked Out during your opponent’s last turn. If you can force a Knock Out through poison the Ability can therefore not be activated! Fezandipiti ex isn’t the only thing you can play around — common cards such as [card name=”Unfair Stamp” set=”Twilight Masquerade” no=”165″ c=”name”][/card], [card name=”Legacy Energy” set=”Twilight Masquerade” no=”167″ c=”name”][/card], and [card name=”Gift Energy” set=”Lost Origin” no=”171″ c=”name”][/card] can all have their effects nullified by a poison KO. By managing your Bench you can alter how much damage Terapagos ex does and force Knock Outs through the poison tick. Mastering this aspect of the deck is important if you want to see success with [card name=”Klawf” set=”Paradox Rift” no=”105″ c=”name”][/card]!
[premium]
My Klawf List
[decklist name=”Klawf” amt=”60″ caption=”” cname=”Klawf” set=”Paradox Rift” no=”105″][pokemon amt=”18″]2x [card name=”Klawf” set=”Paradox Rift” no=”105″ c=”deck2″ amt=”2″][/card]2x [card name=”Brute Bonnet” set=”Paradox Rift” no=”123″ c=”deck2″ amt=”2″][/card]2x [card name=”Terapagos ex” set=”Stellar Crown” no=”128″ c=”deck2″ amt=”2″][/card]1x Pecharunt (SVP Promo #149)1x [card name=”Iron Bundle” set=”Paradox Rift” no=”56″ c=”deck2″ amt=”1″][/card]1x [card name=”Genesect” set=”Shrouded Fable” no=”40″ c=”deck2″ amt=”1″][/card]1x [card name=”Radiant Hisuian Sneasler” set=”Lost Origin” no=”123″ c=”deck2″ amt=”1″][/card]1x [card name=”Hisuian Electrode V” set=”Lost Origin” no=”172″ c=”deck2″ amt=”1″][/card]1x [card name=”Lumineon V” set=”Brilliant Stars” no=”40″ c=”deck2″ amt=”1″][/card]1x [card name=”Oranguru V” set=”Astral Radiance” no=”133″ c=”deck2″ amt=”1″][/card]1x [card name=”Pecharunt ex” set=”Shrouded Fable” no=”93″ c=”deck2″ amt=”1″][/card]1x [card name=”Bloodmoon Ursaluna ex” set=”Twilight Masquerade” no=”141″ c=”deck2″ amt=”1″][/card]1x [card name=”Latias ex” set=”Surging Sparks” no=”76″ c=”deck2″ amt=”1″][/card]1x [card name=”Squawkabilly ex” set=”Paldea Evolved” no=”169″ c=”deck2″ amt=”1″][/card]1x [card name=”Fezandipiti ex” set=”Shrouded Fable” no=”38″ c=”deck2″ amt=”1″][/card][/pokemon][trainers amt=”38″]3x [card name=”Arven” set=”Scarlet and Violet” no=”166″ c=”deck2″ amt=”3″][/card]3x [card name=”Boss’s Orders” set=”Brilliant Stars” no=”132″ c=”deck2″ amt=”3″][/card]1x [card name=”Professor’s Research” set=”Brilliant Stars” no=”147″ c=”deck2″ amt=”1″][/card]1x [card name=”Carmine” set=”Twilight Masquerade” no=”145″ c=”deck2″ amt=”1″][/card]1x [card name=”Colress’s Tenacity” set=”Shrouded Fable” no=”57″ c=”deck2″ amt=”1″][/card]1x [card name=”Iono” set=”Paldea Evolved” no=”185″ c=”deck2″ divide=”yes” amt=”1″][/card]4x [card name=”Nest Ball” set=”Paldean Fates” no=”84″ c=”deck2″ amt=”4″][/card]3x [card name=”Night Stretcher” set=”Shrouded Fable” no=”61″ c=”deck2″ amt=”3″][/card]2x [card name=”Ultra Ball” set=”Scarlet and Violet” no=”196″ c=”deck2″ amt=”2″][/card]2x [card name=”Switch Cart” set=”Astral Radiance” no=”154″ c=”deck2″ amt=”2″][/card]1x [card name=”Hisuian Heavy Ball” set=”Astral Radiance” no=”146″ c=”deck2″ amt=”1″][/card]1x [card name=”Precious Trolley” set=”Surging Sparks” no=”185″ c=”deck2″ amt=”1″][/card]1x [card name=”Energy Loto” set=”Astral Radiance” no=”140″ c=”deck2″ amt=”1″][/card]1x [card name=”Lost Vacuum” set=”Lost Origin” no=”162″ c=”deck2″ divide=”yes” amt=”1″][/card]3x [card name=”Ancient Booster Energy Capsule” set=”Paradox Rift” no=”159″ c=”deck2″ amt=”3″][/card]3x [card name=”Binding Mochi” set=”Shrouded Fable” no=”55″ c=”deck2″ amt=”3″][/card]2x [card name=”Forest Seal Stone” set=”Silver Tempest” no=”156″ c=”deck2″ amt=”2″][/card]1x [card name=”Supereffective Glasses” set=”Astral Radiance” no=”152″ c=”deck2″ divide=”yes” amt=”1″][/card]4x [card name=”Area Zero Underdepths” set=”Stellar Crown” no=”131″ c=”deck2″ amt=”4″][/card][/trainers][energy amt=”4″]4x [card name=”Double Turbo Energy” set=”Brilliant Stars” no=”151″ c=”deck2″ amt=”4″][/card][/energy][/decklist]
List Breakdown
This is my current list for [card name=”Klawf” set=”Paradox Rift” no=”105″ c=”name”][/card], it is inspired by the successful lists that have been played at the various Regionals. The deck has a plethora of toolbox-style Pokémon to help support your strategy, but also a nice attacking suite of Pokémon in Klawf, [card name=”Terapagos ex” set=”Stellar Crown” no=”128″ c=”name”][/card], [card name=”Bloodmoon Ursaluna ex” set=”Twilight Masquerade” no=”141″ c=”name”][/card], and kind of the Promo Pecharunt. I’ll start off by talking about some of the tech/supporting Pokémon so you have a better understanding how to use them!
Support Pokémon
[cardimg name=”Oranguru V” set=”Astral Radiance” no=”179″ align=”right” c=”none”][/cardimg]
First up is [card name=”Oranguru V” set=”Astral Radiance” no=”133″ c=”name”][/card], which is decidedly the best starter for the deck. An Oranguru V in the Active helps unlock your setup strategy, normally grabbing a [card name=”Forest Seal Stone” set=”Silver Tempest” no=”156″ c=”name”][/card] and an [card name=”Ancient Booster Energy Capsule” set=”Paradox Rift” no=”159″ c=”name”][/card] to get you going. The Forest Seal Stone can normally grab you your [card name=”Precious Trolley” set=”Surging Sparks” no=”185″ c=”name”][/card] if you don’t have an [card name=”Arven” set=”Scarlet and Violet” no=”166″ c=”name”][/card], or can be used to help you find your [card name=”Double Turbo Energy” set=”Brilliant Stars” no=”151″ c=”name”][/card]. It is also a great Pokémon to promote after you get Knocked Out. In the middle of the game, it can help you grab [card name=”Binding Mochi” set=”Shrouded Fable” no=”55″ c=”name”][/card] to push Terapagos ex damage or the [card name=”Supereffective Glasses” set=”Astral Radiance” no=”152″ c=”name”][/card] if you are up against a deck like [card name=”Charizard ex” set=”Obsidian Flames” no=”125″ c=”name”][/card]. [card name=”Latias ex” set=”Surging Sparks” no=”76″ c=”name”][/card] gives the Oranguru free a Retreat Cost so you can easily switch it out for your preferred attacker!
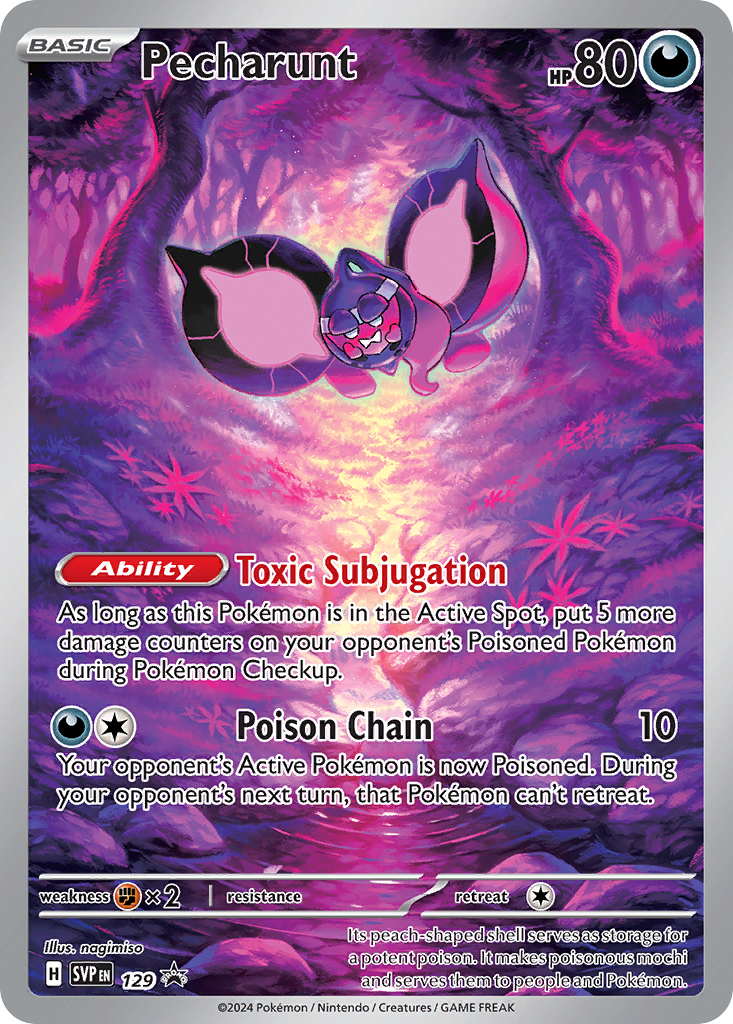
Another great thing about Oranguru V is that in combination with the [card name=”Pecharunt ex” set=”Shrouded Fable” no=”39″ c=”name”][/card] it can help you pull off a turn one donk! It has been a long time since a deck can realistically win the game on the first turn when going first since the rules changed to disallow attacking. While you can’t attack when going first, there are no rules against using Special Conditions like poison! If you can get your [card name=”Brute Bonnet” set=”Paradox Rift” no=”123″ c=”name”][/card] with an [card name=”Ancient Booster Energy Capsule” set=”Paradox Rift” no=”159″ c=”name”][/card], a [card name=”Radiant Hisuian Sneasler” set=”Lost Origin” no=”123″ c=”name”][/card], and Pecharunt in the Active you can place eight counters of poison damage! Now this seems like a lot to pull off on your first turn, but it is honestly not that difficult if you can get the Oranguru V in the Active. By grabbing the Forest Seal Stone you can get the Precious Trolley to set up all the necessary Pokémon and then Oranguru V also grabs the Ancient Booster Energy Capsule to Activate Brute Bonnet’s Ability. You can only retreat once per turn, but to circumvent this you can get the Pecharunt into the Active by using Pecharunt ex’s Subjugating Chains Ability.
This combo is one to be super aware of as you can steal so many games with a first-turn donk. This combo works against a lot of popular Pokémon like [card name=”Charmander” set=”151″ no=”4″ c=”name”][/card], [card name=”Pidgey” set=”151″ no=”16″ c=”name”][/card], [card name=”Minccino ” set=”Temporal Forces” no=”136″ c=”name”][/card], and [card name=”Comfey” set=”Lost Origin” no=”79″ c=”name”][/card] — if you play a deck with these small Pokémon and are going second I would recommend benching multiple of them so you don’t fall victim to a turn one donk!
The Promo Pecharunt is also useful outside of donks. If you have to poison your opponent and you can’t finish them off, you can promote it after one of your Pokémon gets Knocked Out to boost the poison damage your opponent takes. You can also use it when you go second to take Knock Outs on smaller Pokémon and save your Double Turbo Energy. Also if you can’t take a One Hit Knock Out you can promote Pecharunt to help soften up your opponent’s Pokémon while only sacrificing a one-Prize Pokémon.

The [card name=”Genesect” set=”Shrouded Fable” no=”40″ c=”name”][/card] is another Pokémon that [card name=”Area Zero Underdepths” set=”Stellar Crown” no=”131″ c=”name”][/card] helps enable. This deck plays nine Pokémon Tool cards and some of them aren’t necessary at a certain point in the match. For example, once you use Forest Seal Stone the other one isn’t needed, and in most matches, the Supereffective Glasses aren’t necessary. You can throw the extra Pokémon Tool on your Genesect and block a lot of super powerful ACE SPECs, most notably [card name=”Prime Catcher ” set=”Temporal Forces” no=”157″ c=”name”][/card] and [card name=”Unfair Stamp” set=”Twilight Masquerade” no=”165″ c=”name”][/card]. If you go first against a deck that relies on Precious Trolley you can also block it! Genesect isn’t core to your strategy, but it is a nice disruption Pokémon that can sometimes win you games! I sometimes have trouble gauging how good Genesect is since you don’t get to know how many times you blocked your opponent’s ACE SPEC from coming down unless they tell you, but I’ve found the Genesect to be worth the inclusion!
To round out the supporting Pokémon the deck plays the usual suspects in [card name=”Fezandipiti ex” set=”Shrouded Fable” no=”38″ c=”name”][/card], [card name=”Squawkabilly ex” set=”Paldea Evolved” no=”169″ c=”name”][/card], and [card name=”Lumineon V” set=”Brilliant Stars” no=”40″ c=”name”][/card]. All of these Pokémon help consistency, especially Squawkabilly ex. Turn one is super important for this deck, and Squawkabilly ex helps you get off those super powerful turn ones! Lumineon V and Fezandipiti ex help you continue to take Knock Outs as the game goes on. One nice thing about Area Zero Underdepths is that when your opponent inevitably bumps it you can discard your Squawkabilly ex and Lumineon V. You can then recover Lumineon V with [card name=”Night Stretcher” set=”Shrouded Fable” no=”61″ c=”name”][/card] later in the game!
Your Attackers
Moving on to the attackers we have [card name=”Klawf” set=”Paradox Rift” no=”105″ c=”name”][/card], [card name=”Terapagos ex” set=”Stellar Crown” no=”128″ c=”name”][/card], and [card name=”Bloodmoon Ursaluna ex” set=”Twilight Masquerade” no=”141″ c=”name”][/card]. All of them are good at various stages of the game. Klawf is normally your early-game attacker, especially on turn one. With a [card name=”Binding Mochi” set=”Shrouded Fable” no=”55″ c=”name”][/card] and [card name=”Radiant Hisuian Sneasler” set=”Lost Origin” no=”123″ c=”name”][/card] in play, you can hit for 240 damage! This is enough to take out all of the Basic ex and V Pokémon, allowing you to take two Prize cards as early as turn one! Klawf is also fantastic since it is a single-Prize attacker — if your opponent ever has to Knock Out Klawf then they need a minimum of four Knock Outs to win the game. Once your opponent is forced off their optimal Prize map you are free to use your two-Prize Pokémon liberally. Klawf also has great typing, as a lot of popular Pokémon have a Weakness to Fighting, most notably Fezandipiti ex, [card name=”Iron Hands ex” set=”Paradox Rift” no=”70″ c=”name”][/card], Bloodmoon Ursaluna ex, and pretty much everything in the [card name=”Miraidon ex” set=”Scarlet and Violet” no=”81″ c=”name”][/card] deck! Be careful when hitting a Pokémon for Weakness since you normally can’t finish them off through poison damage.
Moving on to Terapagos ex, this is your best midgame attacker. With the Binding Mochi, it is going to be hitting for 290 damage if paired with Radiant Hisuian Sneasler — this is enough to take out all of the VSTAR Pokémon. As I mentioned earlier, you can also control your Bench size to make sure your opponent gets Knocked Out from poison damage. Another cool trick you can pull off with Terapagos ex is if you have a clogged Bench or want to discard liabilities, you can make sure not to bench a second Terapagos ex — once Terapagos gets Knocked Out you need to discard Benched Pokémon until you have five left, so you can discard Bench sitters like Squawkabilly ex. Once your liabilities are cleared from play you can bench a new Terapagos ex and replenish your Bench with better Pokémon!
Finally, there is [card name=”Bloodmoon Ursaluna ex” set=”Twilight Masquerade” no=”141″ c=”name”][/card]. This card has the same damage output as a Terapagos ex under a full Bench if it has a [card name=”Double Turbo Energy” set=”Brilliant Stars” no=”151″ c=”name”][/card] attached, but when your opponent is at one Prize card it can attack for free. With a Binding Mochi and Radiant Hisuian Sneasler, it maxes out at 310 damage! One thing this deck struggles with is it only has four copies of Double Turbo Energy; in the late game it can be tough to draw that last copy or two, especially if your hand has been disrupted by something like an [card name=”Iono” set=”Paldea Evolved” no=”185″ c=”name”][/card]. Often your opponent has to go down to one Prize remaining if you follow the standard line of attacking with Klawfs and Terapagos ex — in this case, it is super easy to get Bloodmoon Ursaluna ex out and finish the game. Try and keep this in mind when planning your Prize map. If your opponent is on odd Prize cards then more likely than not you can get a Bloodmoon Ursaluna ex attack for free!

The Trainer cards are pretty standard; [card name=”Arven” set=”Scarlet and Violet” no=”166″ c=”name”][/card] is great turn one to get the [card name=”Precious Trolley” set=”Surging Sparks” no=”185″ c=”name”][/card], but can also be used later in the game to get Pokémon Tools if you haven’t established [card name=”Oranguru V” set=”Astral Radiance” no=”133″ c=”name”][/card], or in a pinch can grab the [card name=”Energy Loto” set=”Astral Radiance” no=”140″ c=”name”][/card] to have a chance at a Double Turbo Energy. The deck also plays one copy of [card name=”Colress’s Tenacity” set=”Shrouded Fable” no=”57″ c=”name”][/card], which pairs super nicely with Terapagos. ex, but you do need to use [card name=”Lumineon V” set=”Brilliant Stars” no=”40″ c=”name”][/card] for it quite often though. The deck also plays one copy of [card name=”Carmine” set=”Twilight Masquerade” no=”145″ c=”name”][/card], which you can also find with Lumineon V.
It might seem out of place to play [card name=”Switch Cart” set=”Astral Radiance” no=”154″ c=”name”][/card] with [card name=”Latias ex” set=”Surging Sparks” no=”76″ c=”name”][/card] in the deck, but the healing can be relevant against [card name=”Regidrago VSTAR” set=”Silver Tempest” no=”136″ c=”name”][/card] if they try and use [card name=”Kyurem” set=”Shrouded Fable” no=”47″ c=”name”][/card], and sometimes Latias V is prized or you need to get Oranguru V into the Active and still be able to retreat. The [card name=”Lost Vacuum” set=”Lost Origin” no=”162″ c=”name”][/card] has been a nice inclusion as well, often being used to bump our own [card name=”Area Zero Underdepths” set=”Stellar Crown” no=”131″ c=”name”][/card]. This might not make much sense, but you can clear your Bench of liabilities if you discard the Stadium when you have more than five Benched Pokémon. It can also be used to discard an opponent’s Pokémon Tool cards if necessary.
Matchups
Regidrago VSTAR — Favoured
I’m going to start with the most popular deck in the format, and debatably the BDIF. I’d say this is a favourable matchup since you can trade up, Knocking Out their Basic two-Prize Pokémon with our one-Prize [card name=”Klawf” set=”Paradox Rift” no=”105″ c=”name”][/card]. You can also take a Knock Out when going second, which instantly puts you in the driver’s seat. Regidrago VSTAR decks don’t attack on their first turn, so you have lots of time to set up when going first. Often Regidrago VSTAR players will try and end their first turn with a one-Prize Pokémon in the Active like [card name=”Cleffa” set=”Obsidian Flames” no=”80″ c=”name”][/card]… If this happens, use [card name=”Iron Bundle” set=”Paradox Rift” no=”56″ c=”name”][/card] to force a two-Prize Pokémon into the Active. If they have a strong start and have another single-Prize Pokémon on the Bench then I normally look to use Pecharunt (or only [card name=”Radiant Hisuian Sneasler” set=”Lost Origin” no=”123″ c=”name”][/card] if it is Cleffa) to take the first Knock Out while leaving my own one-Prize Pokémon in the Active Spot.
Regidrago VSTAR can try and get tricky sometimes, using [card name=”Kyurem” set=”Shrouded Fable” no=”47″ c=”name”][/card] to put 110 damage on three two-Prize Pokémon, aiming to win the game in two attacks. If this happens, you need to use Switch Cart to move one of the Pokémon or use Lost Vacuum to remove the Area Zero Underdepths to discard them. I have found that this matchup has been pretty easy as long as you set up, but keep track of when your board is vulnerable to disruption or a Kyurem play!
Charizard ex — Even
[cardimg name=”Hisuian Electrode V” set=”Lost Origin” no=”172″ align=”right” c=”none”][/cardimg]
This is a matchup where I’ve found it entirely depends on how well the [card name=”Charizard ex” set=”Obsidian Flames” no=”125″ c=”name”][/card] player can set up. If they can get to a board state that can pull off a [card name=”Dusknoir” set=”Shrouded Fable” no=”20″ c=”name”][/card] and [card name=”Briar” set=”Stellar Crown” no=”132″ c=”name”][/card] combo they will probably win, but you have the opportunity to put a lot of pressure on them. When going first try your best to get a turn-one Knock Out with the Pecharunt combo. This immediately puts your opponent on the back foot and lets you put them on an extremely tight clock to pull off their strategy.
The deck plays [card name=”Hisuian Electrode V” set=”Lost Origin” no=”172″ c=”name”][/card] and [card name=”Supereffective Glasses” set=”Astral Radiance” no=”152″ c=”name”][/card] specifically for this matchup — it is an easy-to-pull-off combo that can Knock Out Charizard ex once per game. After you’ve done this combo once you want to pivot to trying to [card name=”Boss’s Orders” set=”Brilliant Stars” no=”132″ c=”name”][/card] their [card name=”Pidgeot ex” set=”Obsidian Flames” no=”164″ c=”name”][/card] and Knock it Out with [card name=”Terapagos ex” set=”Stellar Crown” no=”128″ c=”name”][/card]. Notice that both of these Knock Outs will be through poison damage, which is extremely relevant in this matchup; not only does their deck play [card name=”Fezandipiti ex” set=”Shrouded Fable” no=”38″ c=”name”][/card], but the most common ACE SPEC is [card name=”Unfair Stamp” set=”Twilight Masquerade” no=”165″ c=”name”][/card]. Protecting yourself from the disruption is massive!
The Aggro Decks (Raging Bolt ex, Miraidon ex, Roaring Moon ex) — Even
I am going to kind of lump these decks together since the matchups play so similarly to one another. In each of these matchups, [card name=”Klawf” set=”Paradox Rift” no=”105″ c=”name”][/card] will always be your attacker of choice since it only gives up one Prize card. Aggro matchups are always a race of who can pull off the most efficient Prize map and do it the quickest. Against all these decks you want to be going second so you have the opportunity to take the first Knock Out with Klawf.
[card name=”Raging Bolt ex ” set=”Temporal Forces” no=”123″ c=”name”][/card] and [card name=”Roaring Moon ex” set=”Paradox Rift” no=”124″ c=”name”][/card] will try and Knock Out Klawf with their own single-Prize attackers, so make sure you have a plan to use gusts to keep a 2-2-2 Prize map. [card name=”Miraidon ex” set=”Scarlet and Violet” no=”81″ c=”name”][/card] decks will use [card name=”Iron Hands ex” set=”Paradox Rift” no=”70″ c=”name”][/card] to try and Knock Out your Klawf to maintain their own Prize map. One thing to note against Miraidon ex is that even if your opponent Knocks Out a Klawf they can still win in three turns if they Knock Out a [card name=”Squawkabilly ex” set=”Paldea Evolved” no=”169″ c=”name”][/card] or [card name=”Lumineon V” set=”Brilliant Stars” no=”40″ c=”name”][/card] with Iron Hands ex, so be super vigilant about discarding them from your Bench in that matchup!
If you go first against any of these decks make sure to put a one-Prize Pokémon in the Active and have another one on your Bench to protect from [card name=”Iron Bundle” set=”Paradox Rift” no=”56″ c=”name”][/card].
Finally, try and take Knock Outs with poison in this matchup. All of these aggressive decks rely heavily on Fezandipiti ex to draw cards — if you are playing from behind try and take a Knock Out from poison damage in combination with your [card name=”Iono” set=”Paldea Evolved” no=”185″ c=”name”][/card] to have a greater chance of your opponent whiffing what they need!
Gardevoir ex — Unfavoured
[card name=”Gardevoir ex” set=”Scarlet and Violet” no=”86″ c=”name”][/card] is a deck that has slowly been creeping its way back into the metagame after a short fall from grace. It is one of this deck’s toughest matchups; there isn’t an easy way to Knock Out Gardevoir ex in this matchup unless you attack with [card name=”Bloodmoon Ursaluna ex” set=”Twilight Masquerade” no=”141″ c=”name”][/card] when they are at one Prize remaining. Your opponent will have lots of two-Prize Pokémon to pick off of your board to accelerate their Prize map while you are stuck settling for one-Prize Knock Outs.
 The way to have a chance in this matchup is to take as many early Knock Outs as you can with your single-Prize Pokémon — always attack with Klawf or use Pecharunt to hopefully force your opponent to take one-Prize KOs. Going first and getting a turn one Knock Out with the Pecharunt is massive and gives you the chance to jump out to a massive lead.
If possible, try and play this matchup with as few two-Prize Pokémon on your Bench as you can manage. If you need a lot of them for support in the early game, try and clear your board of them later in the game with [card name=”Lost Vacuum” set=”Lost Origin” no=”162″ c=”name”][/card], ideally leaving yourself with only single-Prize Pokémon.
Conclusion
That is going to bring today’s article to a close. [card name=”Klawf” set=”Paradox Rift” no=”105″ c=”name”][/card] has been one of the most surprising Tier 1 decks in a long time, seemingly coming out of nowhere, however, I am certain it is here to stay, and I predict its metashare to continue climbing. The deck is also a ton of fun to play and has a surprising amount of depth for an aggressive deck.
As someone who normally stays away from aggressive archetypes, I’ve found myself loving the crab! Let me know down below if you have any questions. I look forward to writing for you again soon!
[/premium]